Harrier

harrier-enemy-bloodstained-ritual-of-the-night-wiki-guide300px
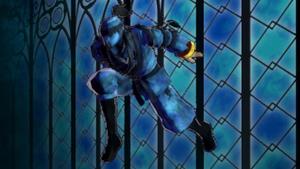
A man in constant search of one faster than himself
Location Den of Behemoths
Drops -
Shard Accelerator 100.00%
Stats
LVL 40
HP 290
XP 216

Harrier are hostile Enemies in Bloodstained: Ritual Of The Night that the player can confront to obtain experience, items, shards, materials, weapons, armor, and accessories. They posses different abilities and movements.


Harrier Enemy Description

  • A really fast ninja


Harrier Location


Harrier Drops


Harrier Combat Information

  • Harrier won't fight you but race you in a course located on the left down part of  Den Of Behemoths. When farming this shard, you can complete the race and begin returning to the beginning of the race before the Harrier has completed. This will still earn you the shard.
Resist
cut-icon-bloodstained-ritual-of-the-night-wiki-guide-22px-25 strike-icon-bloodstained-ritual-of-the-night-wiki-guide-22px20 stab-icon-bloodstained-ritual-of-the-night-wiki-guide-22px-25
flame-icon-bloodstained-ritual-of-the-night-wiki-guide-22px-25 ice-icon-bloodstained-ritual-of-the-night-wiki-guide-22px-25 thunder-icon-bloodstained-ritual-of-the-night-wiki-guide-22px0
light-icon-bloodstained-ritual-of-the-night-wiki-guide-22px0 dark-icon-bloodstained-ritual-of-the-night-wiki-guide-22px0 poison-icon-bloodstained-ritual-of-the-night-wiki-guide-22px0
curse-icon-bloodstained-ritual-of-the-night-wiki-guide-22px0 stone-icon-bloodstained-ritual-of-the-night-wiki-guide-22px100  


Harrier Notes & Tips


Enemies
Abyssal Guardian  ♦  Aello  ♦  Allocer  ♦  Amy  ♦  Archdemon  ♦  Assassin  ♦  Axe Outsider  ♦  Barbatos  ♦  Bat  ♦  Blood Bug  ♦  Blood Grinder Knight  ♦  Bloodbringer  ♦  Bomber Morte  ♦  Bone Morte  ♦  Buer  ♦  Buer Armor  ♦  Cannon Morte  ♦  Carabosee  ♦  Carabosse  ♦  Carriage Morte  ♦  Celaeno  ♦  Chair Mimic  ♦  Chariot Buer  ♦  Craftwork  ♦  Cyhyraeth  ♦  Dantalion  ♦  Dark Elemental  ♦  Deathtrap  ♦  Decarabia  ♦  Deeseama  ♦  Demon  ♦  Demon Lord  ♦  Dragon  ♦  Dullahammer  ♦  Dullahammer Head  ♦  Eight Bit Ghost  ♦  Eight Bit Overlord  ♦  Eight Bit Skull  ♦  Eight Bit Zombie  ♦  Fire Elemental  ♦  Forneus  ♦  G Axe Outsider  ♦  Gaap  ♦  Gamigin  ♦  Gargoyle  ♦  Ghost  ♦  Giant Bat  ♦  Giant Buer  ♦  Giant Cannon  ♦  Giant Moco  ♦  Giant Morte  ♦  Giant Rat  ♦  Giant Toad  ♦  Gieremund  ♦  Glashtyn  ♦  Gremory  ♦  Gusion  ♦  Gusion Cannon  ♦  Haagenti  ♦  Hellhound  ♦  Ice Elemental  ♦  Kamikaze  ♦  Killer Barber  ♦  Kunekune  ♦  Lamashtu  ♦  Lance Armor  ♦  Leraje  ♦  Light Elemental  ♦  Lili  ♦  Living Fossil  ♦  Macaron  ♦  Malediction  ♦  Marbas  ♦  Master Carpenter  ♦  Millionaire's Bane  ♦  Mimic  ♦  Moco Weed  ♦  Morte  ♦  Ninja  ♦  Nyabon  ♦  Nyamon  ♦  Ocypete  ♦  Ordog  ♦  Plume Parma  ♦  Poison Toad  ♦  Poltergeist  ♦  Puppy  ♦  Revenant  ♦  Rocky  ♦  Rul'sha  ♦  Sabnock  ♦  Scylla  ♦  Scythe Mite  ♦  Seama  ♦  Seeker  ♦  Shield Outsider  ♦  Shovel Armor  ♦  Sidhe  ♦  Silver Wolfman  ♦  Simian  ♦  Tamako-Death  ♦  Thunder Elemental  ♦  Titania  ♦  Toad  ♦  Tracer  ♦  Triwheel Buer  ♦  Volcano Morte  ♦  Vul'sha  ♦  Water Leaper  ♦  Wolfman  ♦  Zagan  ♦  Zepar


Tired of anon posting? Register!
    • Anonymous

      I completely forgot about this guy until after I finished the main story and map. I used Standstill to get to the end with what felt like more than 15 seconds to spare.

      • Anonymous

        After the vertical section with the three reflector ray mirrors there is a section with spikes on the ceiling and then spikes on the floor. If you already have the dimension shift shard when you do the race, you can use it to pass through the ceiling with the spikes to take a small shortcut which makes it quite a bit easier to win.

      Load more
      ⇈ ⇈