Combat for Bloodstained: Ritual of The Night focus on various ways and/or strategies players can execute in different situations.
Bloodstained: Ritual of the Night Combat
Combat Information
Combat in Bloodstained: Ritual of The Night can be very dynamic as the player face many enemies with different abilities. In order to face the enemies, the player can use a variety of weapons (which vary between melee and ranged), armor, accessories and a set of skills that are acquired by equipping Shards.
Builds:
By combining different Shards and different weapons the player can design different builds according to the enemies they are facing. There is a special type of Skill Shard named “Shortcut” that will enable a special in-game menu where the player can configure different loadouts. Once configured, they can be easily access by a quick-button allowing to quickly change combat tactics on the fly.
Stats:
Stats are the attributes of the Player Character. Players begin with pre-determined stats that increase based on Character Level and Equipment. Some stats, like Health and Mana are upgraded by finding specific items during your exploration. You can find more about stats by pressing HERE.
Health Bar: The health bar (represented in red) is on the top left corner. When the player character receives damage, the HP bar will reduce according to the amount. If the health bar reaches 0 points, the player character will die and a "Game Over" screen will show. After this, the player will come back to the last saved point losing all progress. The players can use items such as potions or eat prepared food by accessing the in-game menu in order to replenish their HP. They can also replenish their health by sitting down on a save point or by using some Shards that restore HP like "healing" or "drain". Players can permanently increase their maximum HP by leveling up, by finding Health Upgrades in the environment or by eating some types of prepared food for the first time. They can also increase their HP buffing their stats by equipping some types of armor and accessories.
Mana Points Bar: The MP bar (represented in violet) is in the top left corner. Some Shards require the use of MP. Depending on the Shard, the MP may be required only to cast the shard or drained by X amount per second in order to maintain the shard active. MP restores by itself at a slow pace. Players can destroy environmental candles or lights that will drop a “Blue Rose”. When consumed, this rose will provide with a small amount of MP. The player can also access the in-game menu to consume ether potions that will restore MP. When sitting on a save-room couch, the MP will be completely restored. Players can permanently increase their maximum MP by leveling up, by finding Mana Upgrades in the environment or by eating some types of prepared food for the first time. They can also increase their MP buffing their stats by equipping some types of Armor and Accessories.
Enemies:
There are a wide variety of enemies each with their own skills and movements. The player can use different weapons or skills according to the type of enemy they are facing. You can find more about enemies by pressing HERE.
Shards:
The player can acquire different type of shards by defeating enemies, bosses or in the environment. To equip them, open the in game menu and select “Shards”
There are 6 types of shards: Conjure Shards, Manipulative Shards, Directional Shards, Passive Shards, Familiar Shards and Skill Shards. Each type of shard can increase in “Rank” and in “Grade”. The rank can be enhanced by crafting providing increased capabilities. The grade can be increased by acquiring more shards of the same type and provides increased power.
The player can only equip with one type of shard at the same time but has the ability to change them in the middle of battle by accessing the in-game menu.
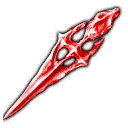 Conjure Shards: They are red and provide only with offensive capabilities. They cannot be directed and are activated when the button is pressed.
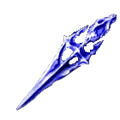 Manipulative Shards: They are blue and provide either defensive or offensive capabilities. They cannot be directed and are activated when the button is pressed.
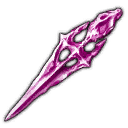 Directional Shards: They are violet and provide offensive or relocation capabilities. In order to use them, the player must aim with the player character first, and then press the button.
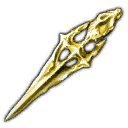 Passive Shards: They are yellow and provide either defensive or offensive capabilities. As the name implies, this shards are passive and provides the effect only by having them equipped. When a Passive Shards reaches a grade of 9 it will transform into a “Skill shard”. Even when transformed, the player can still equip the same passive shard to get the effects doubled.
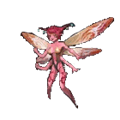 Familiar Shards: They are represented by the icon of the familiar you are summoning. When equipped, a familiar of the chosen type will appear to aid you in combat. There is no need to summon the familiar it will appear as soon as you equip the Familiar Shard. Familiars help the player in combat by directly confronting the enemy, providing boosts, preventing enemy attacks or by casting spells.
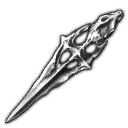 Skill Shards: They are gray and provide the player with passive abilities without the need of having them equipped in any shard slot. They can be turned “On” or “Off” from the in-game Shard Menu. When a Passive Shard acquires grade 9, it will transform into a Skill Shard. If the player has both the Passive Shard equipped and the Skill Shard active, both effects will stack.
Equipment:
There are 6 slots available for the player for equipping Weapon, Head, Body, Accessories, and Scarf.
Weapons:
There are two weapon slots. When equipped with a melee weapon the second slot remains inaccessible. When equipped with a ranged weapon, the second slot provides the rounds. There are 9 types of melee weapons and 1 type of ranged weapon.
- Melee Weapons: Provide with a variety of close quarter combat weapons with different range, attack and speed.
- Ranged Weapons: Provide with a variety of long range weapons that the player can combine with rounds to attack enemies from a safe distance. There is a limited ammount of rounds the player character can carry. To increase this limit, the player can find Capacity Upgrades that are scattered around the map.
Weapons have an ATK value that indicates the amount of damage they deal to enemies. Some weapons possess elemental afflictions that provide with elemental damage or effects to enemies.
Armor:
Armor provides defense, which decreases the amount of damage players takes. They also provide stats boost that can increase both the defense and offense capabilities. Some armor provide resistance to certain elements reducing their effect or damage.
Headgear:
Headgear provides defense which decreases the amount of damage player takes. They also provide stats boost that can increase both the defense and offense capabilities. In addition to their stats, headgear modify the visuals of the player character when equipped.
Scarves:
Scarves provides defense which decreases the amount of damage player takes. They also provide stats boost that can increase both the defense and offense capabilities. In addition to their stats, scarves modify the visuals of the player character when equipped.
Accessories:
There are two accessory slots that the player character can equip and they come in different varieties. There are: Head accessories, eye accessories, Face accessories, Rings, Necklaces and belts. All the head accessories modify the player character visuals while rings, necklaces and belts does not. It is important to note that some accessories can't be worn at the same time. For example you can't equip two different belts or two different glasses while you can equip two different rings.
Accessories can provide unique effects when worn as well as offensive or defensive capabilities.
Status Ailment:
Both players and enemies can be afflicted by different status ailments.
![]() Cut Resistance reduces the amount of damage taken from cutting attacks.
Cut Resistance reduces the amount of damage taken from cutting attacks.
![]() Stab Resistance reduces the amount of damage taken from stabbing attacks.
Stab Resistance reduces the amount of damage taken from stabbing attacks.
![]() Strike Resistance reduces the amount of damage taken from striking attacks.
Strike Resistance reduces the amount of damage taken from striking attacks.
![]() Fire Resistance reduces the amount of damage taken from sources of fire, lava, fire attacks, and spells.
Fire Resistance reduces the amount of damage taken from sources of fire, lava, fire attacks, and spells.
![]() Ice Resistance reduces the amount of damage taken from ice attacks and spells.
Ice Resistance reduces the amount of damage taken from ice attacks and spells.
![]() Thunder Resistance reduces the amount of damage taken from thunder attacks and spells.
Thunder Resistance reduces the amount of damage taken from thunder attacks and spells.
![]() Dark Resistance reduces the amount of damage taken from dark attacks and spells.
Dark Resistance reduces the amount of damage taken from dark attacks and spells.
![]() Light Resistance reduces the amount of damage taken from light attacks and spells.
Light Resistance reduces the amount of damage taken from light attacks and spells.
![]() Poison Resistance reduces the amount of damage taken when poisoned, and reduces the chance to become poisoned.
Poison Resistance reduces the amount of damage taken when poisoned, and reduces the chance to become poisoned.
Note: When the player becomes poisoned it must consume either Mithridate or Panacea to remove the effect
![]() Curse Resistance reduces the chance to become cursed.
Curse Resistance reduces the chance to become cursed.
Note: When the player becomes cursed half of their MP and HP bar will be reduced and inaccessible while the curse lasts. In order to remove the effect, the player can either wait or consume Holy Water or Panacea
![]() Petrification Resistance reduces the chance to become petrified.
Petrification Resistance reduces the chance to become petrified.
Note: When the player becomes petrified it will be incapacitated and unable to move until the effect ends. In order to remove the effect, players can either wait or consume Stonethaw or Panacea.
Saving & Death:
The player will encounter red rooms inside the castle that have a couch in the middle of them. When sitting on the couch HP and MP will be restored and the player can save their game progress.
When the health bar reaches 0 points, the player character dies and a Game Over screen will show. All progress done since the last time the game was saved will be permanently lost.
Movesets:
There are bookshelves scattered across the castle that players can read. Some of them possess movesets that the player can perform with determined weapons. Once learnt, if the player is equipped with the appropriate weapon and press the correct combination of buttons the moveset will be performed. When a moveset is performed successfully, a mastery bar will slowly fill improving the ability.
Movesets in Bloodstained: Ritual of the Night are special moves that cost MP to perform. Each move has special abilities from more damage to new movement capabilities that gives allows the player to unlock features of the game.
Once a move has been mastered, it can be used on all weapons of the same type (Except for Valkyrie Strike, Lunging Serpent, and Back Steal).
| Attack/Move | MP cost | Controls | Weapons | Description |
| Power Slash | 20 | |
A powerful one-handed blade attack. | |
| Crimson Blizzard | 30 | |
Channel your fighting spirit into your blade, then unleash it. | |
| Critical Swing | 30 | Lash at enemies with a single, mighty strike. | ||
| Eleventh Hour | 20 | |
Deflect physical attacks. | |
| Flashing Air Kick | 15 | Perform up to three spinning kicks by repeating the same command. | ||
| Hatchet Heel | 20 | While airborne, bring your heel down on enemies like the fall of an axe . | ||
| Helmsplitter | 20 | Leap forward and bring your blade down on the enemy's head. | ||
| Orbital Wheel | 60/s | Create a defensive barrier by spinning your spear. | ||
| Rapid Fire | 80/s | Hold the command button to keep firing. | ||
| Sansetsuzan | 20 | Chain together up to three vicious strikes by repeating the command. | ||
| Trucidating Gyre | 50 | Spin toward enemies and transfer the momentum to your blade. | ||
| Surprise Gift | 30 | |
Throw the dagger at your foes | |
| Thousand Blossoms | 20/s | |
Mash the attack button to unleash multiple stabs | |
| Lunging Serpent | 30 | |
Extends your staff for higher reach and damage | |
| Force Blast | 30 | Draw on your sword's magical power and unleash it upon enemies. | ||
| Assassinate | 30 | Teleport behind your enemy and inflict a deadly stab | ||
| Jinrai | 50 | |
A dashing slash fast enough to freeze time | |
| Parry | 15 | |
Parry any attack and unleash a counter | |
| Valkyrie Strike | Can be used after mastering all the other moves | |||
| Back Steal | 30 | Teleport behind your enemy and inflict a deadly stab. Can steal items from enemies | ||
| Lasting Wound | 30 | Unleash a trio of slashes in a single breath | ||
| Crescent Stroke | 30 | Slash upward as if drawing an arc. | ||
| Sickle Moon | 60/s | Close the distance and slash upward. | ||
| Penetrate | 60/s | Charge through enemies with your spear at the ready. |
 Anonymous
They are called techniques, not movesets (which is actually two separate words btw). This discrepancy mase it hard to find the information on the wiki.

 Anonymous
Sickle moon is a technique with the Gram so far. Quarter Circle forward.


Power tip: Use gebel's glasses and words of wisdom, along with standstill to master techniques quickly. Bonus is the stack two enemies then freeze them, then you have unlimited MP and get double credit towards learning. I used the knight/dog right outside the "Entrance" teleport.
Techniques missing from list:
Gram / Schedar / Durandal - Sickle Moon - Down to forwards and attack
Joyeuse / Misericorde - Lasting Wound - forward back forward and attack
Gondo-Shizunori / Leng Yan Ju - Penetrate - Down to forwards and attack (HOLD attack)
1
+10
-1